Introduction
In the realm of woodworking, precision and strength reign supreme. To achieve these carpentry holy grails, woodworkers the world over turn to the Kreg Pocket Hole Jig 320, an indispensable tool for creating invisible, durable, and aesthetically pleasing joints. This comprehensive guide will take you on a step-by-step journey through the art of pocket hole joinery, empowering you to craft furniture, shelves, picture frames, and more with unwavering confidence. Brace yourself for a masterclass in woodcraft that will transform your carpentry skills.
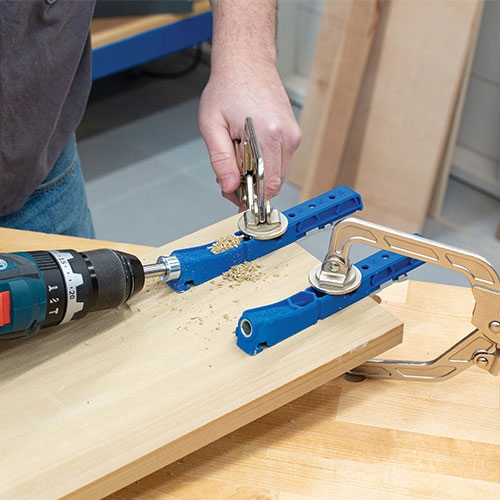
Image: baptist.nl
Delving into the Kreg Pocket Hole Jig 320
The Kreg Pocket Hole Jig 320 is a specialized woodworking tool designed to create precise angled holes known as pocket holes. These holes are angled away from the edge of the board, allowing screws to be driven into the joint at an angle, resulting in a strong, hidden connection. The jig guides the drill bit to create the perfect-sized pocket holes, ensuring consistency and minimizing the risk of splitting or weakening the wood.
Step-by-Step Guide
Materials:
- Kreg Pocket Hole Jig 320
-
2 Square-Drive Screws
- Drill
- Drill bit (size 3/16″)
- Material Clamp
- Measuring Tape or Ruler
- Pencil or Awl
Instructions:
1. Set up the Jig:
- Determine the desired hole spacing and thickness of the boards you’re joining.
- Set the jig’s center stop and fence accordingly.
- Clamp the jig securely to your workbench.
2. Mark the Pocket Hole Locations:
- Use a pencil or awl to mark the desired locations for the pocket holes on the edge of the boards. Ensure the marks are aligned with the center stop on the jig.
3. Drill the Pocket Holes:
- Insert a #2 square-drive screw into the drill chuck.
- Align the marked hole location with the drill guide on the jig.
- Clamp the workpiece to the jig for stability.
- Drill the pocket hole at an angle, following the guide. Repeat for all marked locations.
4. Assemble the Joint:
- Apply a small amount of wood glue to the mating surfaces of the boards.
- Insert #2 square-drive screws into the pocket holes at a 90-degree angle.
- Drive the screws until they are snug, but not overtightened.
Expert Insights and Tips
- Use a brad point drill bit to create clean and precise pocket holes that minimize tear-out.
- Experiment with different hole spacing to fine-tune the strength and aesthetics of your joints.
- For extra strength, use self-tapping screws designed for pocket hole joinery.
- Test your settings on scrap wood before committing to your actual workpiece.
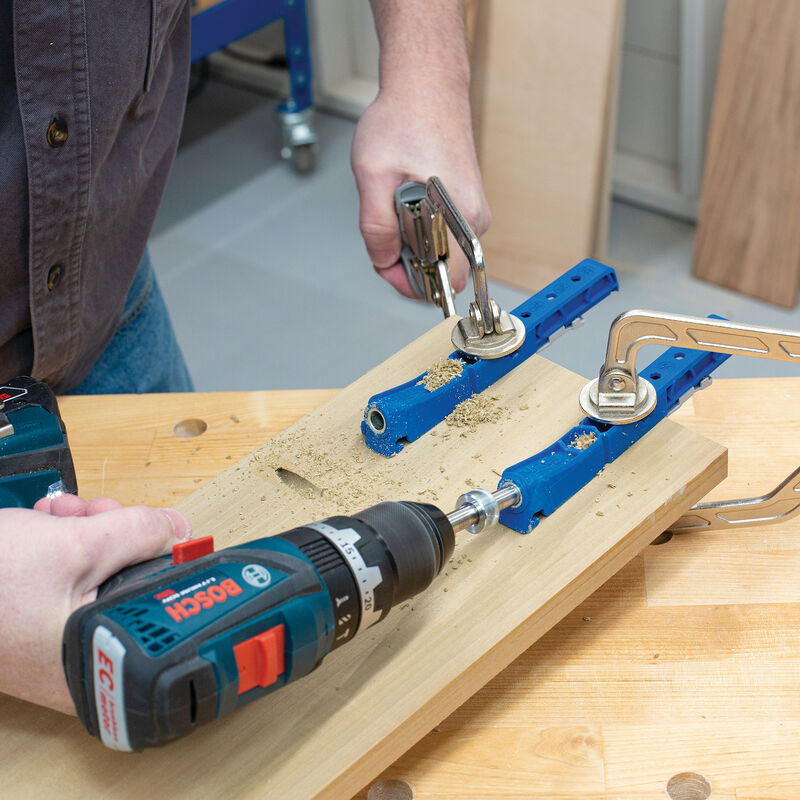
Image: www.kregtool.com
How To Use Kreg Pocket Hole Jig 320
https://youtube.com/watch?v=UP8iHJzJj-k
Conclusion
Mastering the art of pocket hole joinery with the Kreg Pocket Hole Jig 320 empowers woodworkers to create robust, aesthetically pleasing connections with ease. By following the steps outlined in this guide and incorporating the expert insights provided, you can unlock the full potential of this game-changing tool. Whether you’re a novice woodworker or a seasoned pro, the Kreg Pocket Hole Jig 320 will elevate your carpentry skills and inspire you to explore countless creative projects. So, grab your trusty jig and let the woodworking journey begin!
